Avoid PC Building Fails: A 2025 Guide for New Builders

Avoid These Common PC Building Mistakes: A 2025 Guide for First-Time Builders helps new PC enthusiasts navigate the complexities of building their own computer, offering up-to-date strategies and insights to prevent common pitfalls and ensure a smooth, successful build.
Embarking on your first PC build can be an exhilarating experience, but it’s also fraught with potential pitfalls. Don’t let easily avoidable errors turn your dream machine into a source of frustration. This comprehensive guide, Avoid These Common PC Building Mistakes: A 2025 Guide for First-Time Builders, is tailored to equip you with the knowledge and foresight needed to navigate the process successfully.
Choosing the Wrong Components
Selecting the right components is the foundation of a successful PC build. Compatibility issues, insufficient power, or mismatched performance levels can all lead to headaches down the line. A bit of forethought and research can save you considerable time and money.
Compatibility is Key
Before buying anything, ensure all your components are compatible. This includes the CPU and motherboard socket types, RAM frequency and type, and PCIe slot versions for your graphics card and other expansion cards. Use online compatibility checkers or consult forums to confirm your build.
Power Supply Unit (PSU) Over or Undersizing
The PSU is the heart of your system, providing power to all components. Undersizing can lead to instability or failure, while oversizing simply wastes money. Calculate your system’s power requirements and choose a PSU with some headroom for future upgrades.
- Check CPU and GPU TDP (Thermal Design Power) ratings.
- Add power requirements for other components like RAM, storage, and peripherals.
- Factor in overclocking potential.
- Choose a reputable brand with good efficiency ratings.
Careful component selection is the cornerstone of a successful PC build. Ensuring compatibility and appropriate power delivery sets the stage for a smooth and reliable computing experience.
Forgetting Essential Tools and Preparation
Having the right tools and a well-prepared workspace can make the PC building process significantly smoother and reduce the risk of accidental damage. Don’t underestimate the importance of this step.
Static Electricity Protection
Static electricity can wreak havoc on sensitive electronic components. Always use an anti-static wrist strap grounded to your PC case while handling components. Work on a non-carpeted surface to minimize static buildup.
Essential Tools
Gather all the necessary tools before you start. This typically includes a Phillips head screwdriver (magnetic is helpful), zip ties or Velcro straps for cable management, and potentially a flashlight for better visibility inside the case.
- Anti-static wrist strap
- Phillips head screwdriver (magnetic)
- Zip ties or Velcro straps
- Flashlight
Proper preparation, including adequate protection from static electricity and readily available tools, streamlines the building process and minimizes the chance of component damage.
Improper CPU Cooler Installation
The CPU cooler is crucial for keeping your processor running at optimal temperatures. Improper installation can lead to overheating, performance throttling, and even permanent damage to your CPU.
Applying Thermal Paste Incorrectly
Thermal paste helps transfer heat from the CPU to the cooler. Apply the correct amount – usually a pea-sized dot in the center of the CPU – and ensure even distribution. Too much or too little can hinder heat transfer.
Securing the Cooler Properly
Ensure the cooler is securely mounted to the motherboard. Check the mounting brackets and screws to ensure they are properly tightened. A loose cooler won’t make good contact with the CPU, leading to overheating.
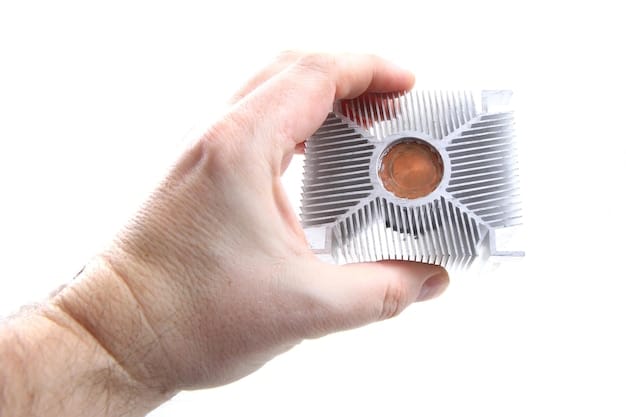
Proper CPU cooler installation is vital for maintaining optimal processor temperatures. Accurate thermal paste application and secure mounting are essential steps in preventing overheating and ensuring system stability.
Neglecting Cable Management
Cable management is often overlooked by first-time builders, but it’s crucial for airflow, aesthetics, and future upgrades. A tidy build runs cooler and is easier to work with.
Routing Cables Strategically
Plan your cable routing before connecting components. Utilize the cable management features of your case, such as routing channels and tie-down points. Keep cables away from fans and other moving parts.
Hiding Excess Cables
Hide excess cable length behind the motherboard tray or in the PSU shroud. Use zip ties or Velcro straps to bundle and secure cables. This will improve airflow and give your build a cleaner look.
- Plan cable routes before connecting components.
- Use cable management features in your case.
- Hide excess cable length.
- Bundle and secure cables with ties.
Effective cable management is more than just aesthetics; it’s about optimizing airflow and ensuring easy access to components for future maintenance and upgrades.
Installing Components in the Wrong Order
The order in which you install components can significantly impact the ease and efficiency of the build. Following a logical sequence can prevent unnecessary complications.
Starting with the Motherboard
Begin by installing the CPU, RAM, and M.2 SSD on the motherboard before mounting it in the case. This is easier to do outside the confines of the case.
Installing the Motherboard and Other Components
Next, mount the motherboard in the case, followed by the graphics card, PSU, and storage drives. Connect the necessary cables and ensure everything is securely fastened.
- Install CPU, RAM, and M.2 SSD on the motherboard first.
- Mount the motherboard in the case.
- Install the graphics card, PSU, and storage drives.
- Connect all necessary cables securely.
Strategic component installation, starting with the motherboard and proceeding in a logical order, streamlines the building process and minimizes potential difficulties.
Ignoring the Manuals
Every component comes with a manual that provides important information about installation, compatibility, and troubleshooting. Ignoring these manuals can lead to mistakes and frustration.
Reading the Motherboard Manual
The motherboard manual is particularly important. It details the location of various connectors, supported RAM configurations, and PCIe slot usage. Consult it frequently during the build process.
Understanding Component Specifications
Pay attention to the specifications listed in the manuals for each component. This includes power requirements, operating temperatures, and compatibility information. Following these guidelines will ensure optimal performance and longevity.
Consulting component manuals is crucial for understanding specifications, installation instructions, and troubleshooting tips, leading to a more successful and optimized PC build.
Testing Before Final Assembly
Testing your system before fully assembling it can save you a lot of time and effort in the long run. It allows you to identify and correct any issues before they become more difficult to diagnose.
The “Breadboard” Test
Perform a “breadboard” test by connecting the essential components – CPU, motherboard, RAM, and GPU – outside the case. Power on the system and check if it POSTs (Power-On Self-Test). This confirms that the core components are working correctly.
Checking for Driver Issues
After installing the operating system, check for any driver issues. Download and install the latest drivers for your motherboard, graphics card, and other peripherals. This will ensure optimal performance and stability.
| Key Point | Brief Description |
|---|---|
| 🛠️ Component Compatibility | Ensure all components are compatible before purchasing. |
| ⚡ PSU Sizing | Calculate power needs to avoid undersizing or oversizing the PSU. |
| 🧤 Static Protection | Use an anti-static wrist strap to protect components. |
| 🌡️ CPU Cooler Installation | Apply thermal paste and securely mount the CPU cooler. |
FAQ
▼
Before starting, research and select compatible components. Verify that your CPU and motherboard sockets match, and that your RAM is compatible with your motherboard. Planning ensures a smooth build without compatibility issues later.
▼
Apply a pea-sized amount of thermal paste in the center of the CPU. When you install the CPU cooler, the pressure will spread the paste evenly. Using too much can insulate heat, and too little can cause overheating.
▼
Cable management improves airflow inside the case, preventing components from overheating. It also makes your build look cleaner and makes future upgrades easier by providing better access to components.
▼
A breadboard test involves connecting essential components (CPU, motherboard, RAM, GPU) outside the case to ensure they POST. This helps identify any faulty components before you fully assemble the PC, saving time and frustration.
▼
First, double-check all power connections to the motherboard, CPU, and GPU. Ensure the PSU switch is on and that all components are properly seated. Consult your motherboard manual for troubleshooting steps, and consider a breadboard test.
Conclusion
Building your own PC is a rewarding experience. By avoiding these common mistakes and following best practices, you can ensure a smooth and successful build, resulting in a high-performance machine that meets your specific needs. Happy building!

